 |
Wouldn't a Barn Quilt look nice centered on my barn? |
After doing some research, I found that a small barn quilt trail had been started at my adjacent county Perry County, the quilts were designed by HS students. With further research I found a great web site that even went into detailed instructions on how to prepare and build a barn quilt.
https://www.extension.iastate.edu/Documents/MCMS/flPlymouthCountyISUBarnQuiltDirections.pdf


There it was. Easy right??!!
The hard part was picking a design and then the colors. Jinny Beyers had a great selection of traditional quilt blocks on her web site which I found very helpful
https://www.jinnybeyer.com/quilting-with-jinny/design-board/browse.cfm?page=5&sort=newest&limit=48
My barn was built in the late 1800's and it sits behind my traditional 1800 Limestone Farmhouse. I needed a traditional block with traditional colors to fit into my setting. There were way too many choices, but I narrowed it down to these blocks. The final decision went to The Grandma's Star.


I got an oil based primer, I bought Zinser brand, and put on 3 coats to the bare wood. I also primed the base/frame pieces.


Plus I have my handy blue tooth speaker to provide me entertainment as I work through this project! Thanks to my lovely daughter and her husband for the nice gift that I continue to use!
 |
| My Bluetooth Speaker Entertainment |
 |
3 coats of Primer on boards |
 |
| base boards primed |
Update 8/13/2017:
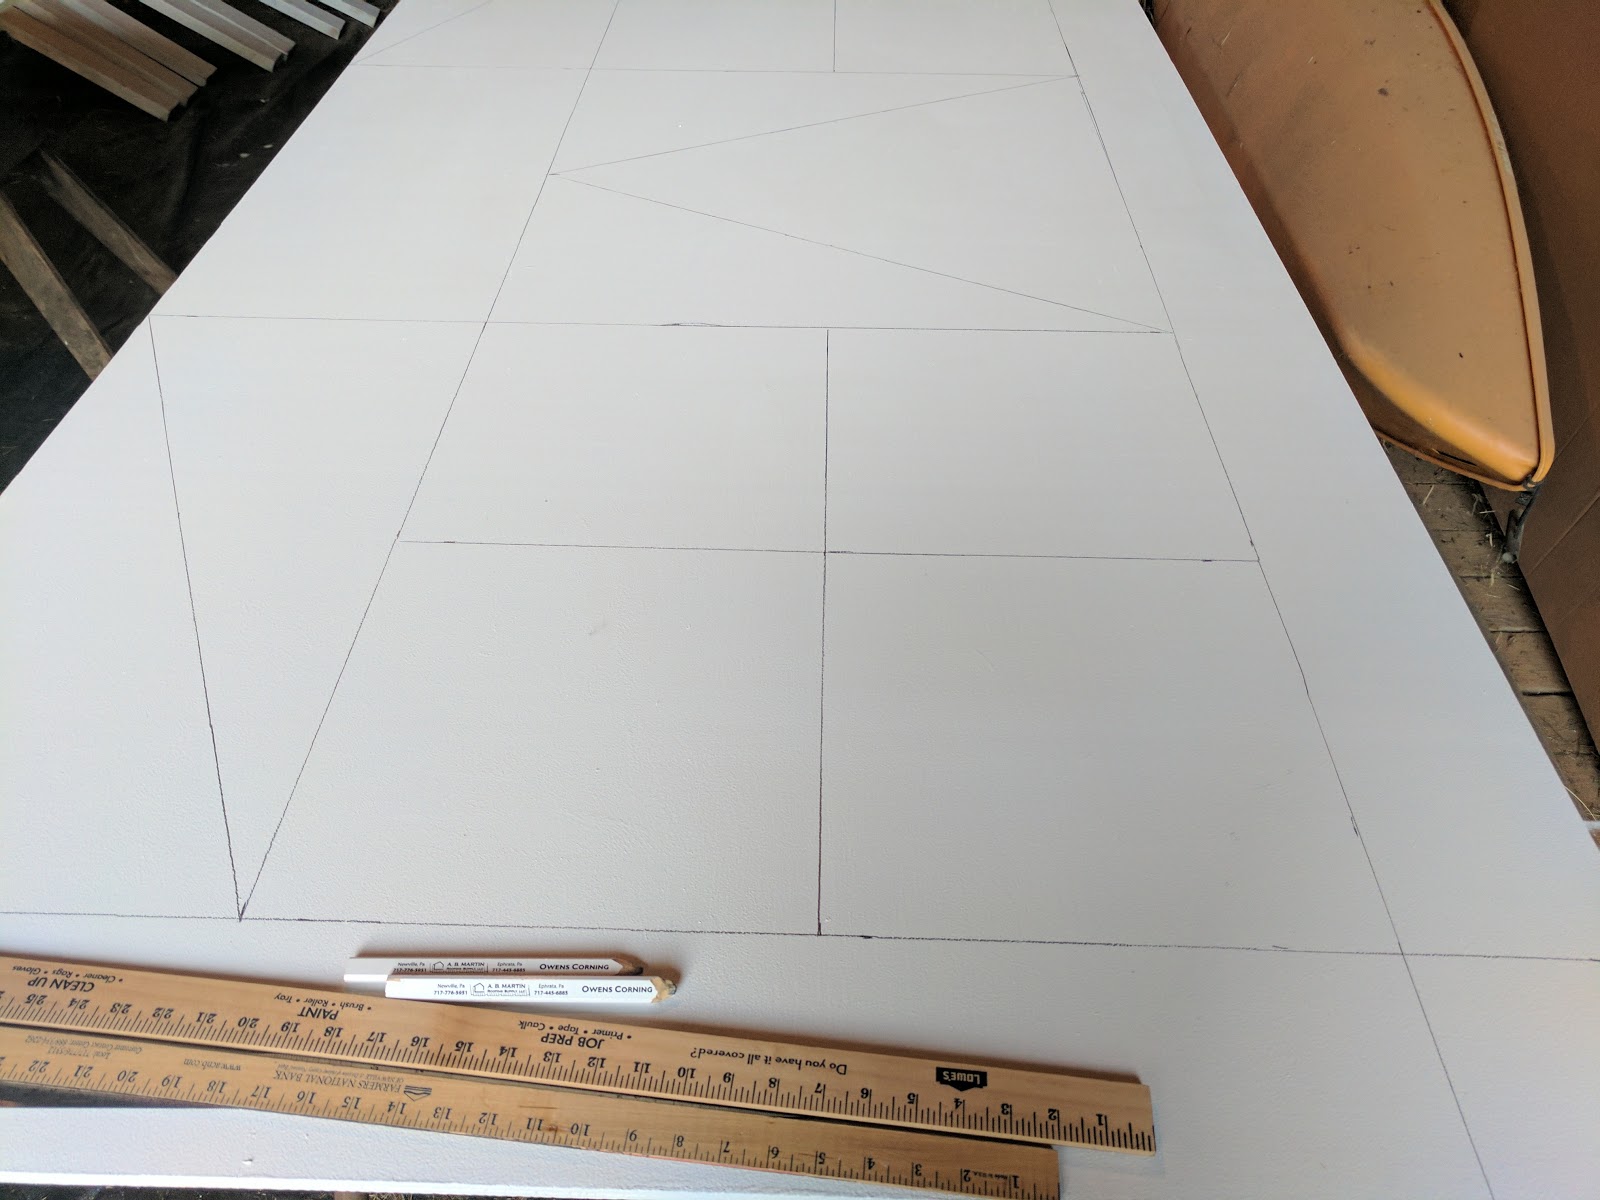
Yesterday I measured and marked out my quilt blocks on the primed boards. I used pencil and yardsticks. Below a picture, but it is difficult to see.
 |
Sketch with measurements |
 |
| You can see the corner 4 patch |
So I began to paint last night! I started by taping around the blocks I was painting. I'm starting with my lighter colors and then will move to the dark colors. Since Im using tape to get sharp points, It is necessary to wait before putting tape on top of the previously painted areas. Per the instructions on the tape. It must have been dried over 24 hours : ( Can I be that patient?
 |
White and light Teal is painted |
More updates later!
8/18/17
So my Barn Quilt project is going well. I began my last color yesterday. I have little patience and the waiting hours between coats of paint has been extremely difficult for me!
I placed 2 coats of each paint color, before moving onto next color. I waited approximately 10 hours between each coat. The paint has seemed to be pretty set and dry at this point and I have not had any problems with paint coming off when I removed the tape.


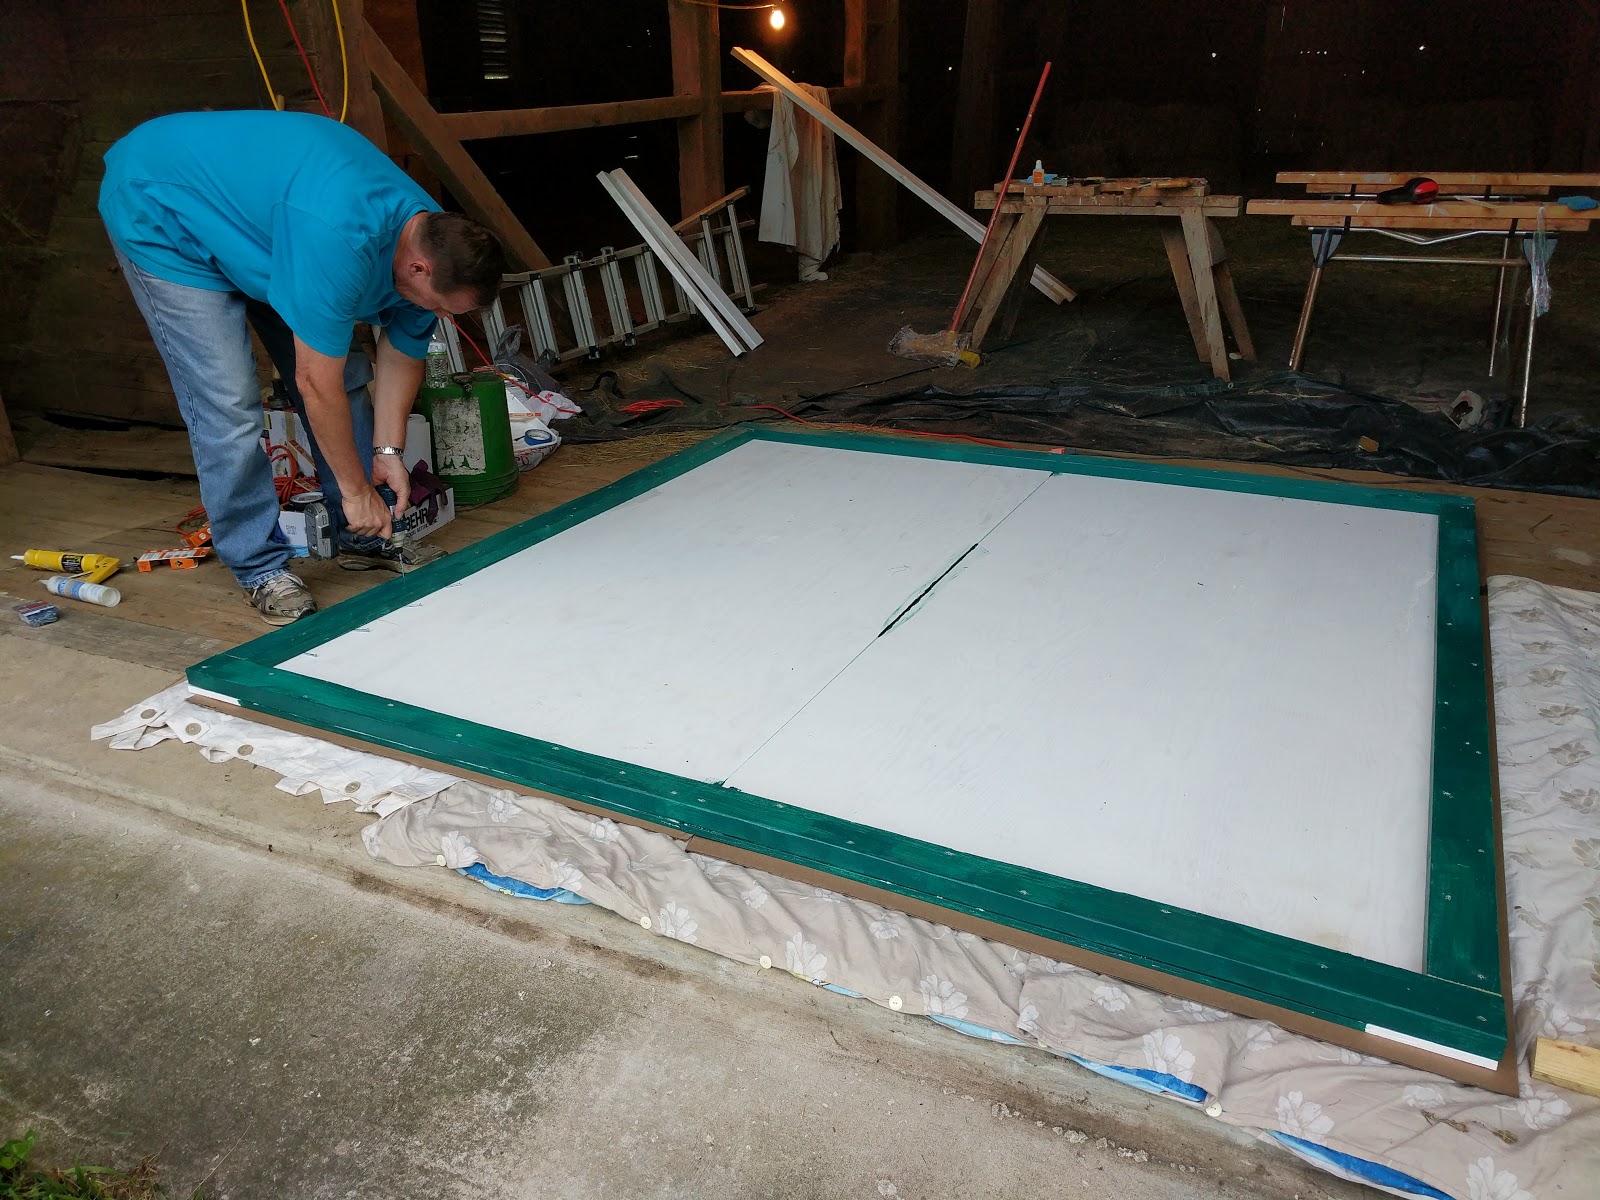
Today I'm removing the last of the tape, adding a coat of paint to the frame pieces (2x4's).And then start constructing the frame for the back of the quilt, (With the help of my handy husband and his power tools!)
8/29/17
She's up!! The barn quilt that is. Ill catch up now on the rest of my process
With my husbands help we framed the plywood boards to give it stability and to hold the 2 4x8 pieces together. we fiirst placed gorilla glue and then drove screws through the 2x4 just into the plywood, avoiding puncturing the front of the quilt itself. My husband used 1 3/4 wood screws. #8X.


She's done, and now we have to move her. She was extremely heavy at this point.


On the bottom we placed L brackets. After determining placement, We drilled the L Brackets f into the barn and they assisted in keeping the quilt level while the top brackets were drilled in. Almost like a shelf, and then these were screwed to bottom base 2x4.
We placed flat long metal brackets on back of the top 2x4 and screwed those through front of the barn where there was a beam behind the boards.(Almost like drilling into the stud)
And now she is up all I have to do is a little touch up to cover the brackets and some nicks from hanging...
What do you think?


 |
| Add caption Hope this blog was of help to you in getting your barn quilt going. Message me if you need any additional information! Renie |
Maybe you'll start up a business!! Can't wait to see it finished!
ReplyDelete